Cropping and Adjusting
Learn how to crop, rotate, and adjust photos using Keepsake's built-in editor to frame your memories perfectly for your story
Your original photo is always preserved. Crop freely knowing you can revert to the original anytime if you change your mind.
How to Crop Your Photos
Right-click on your photo
Right-click on any photo in your entry to open the context menu
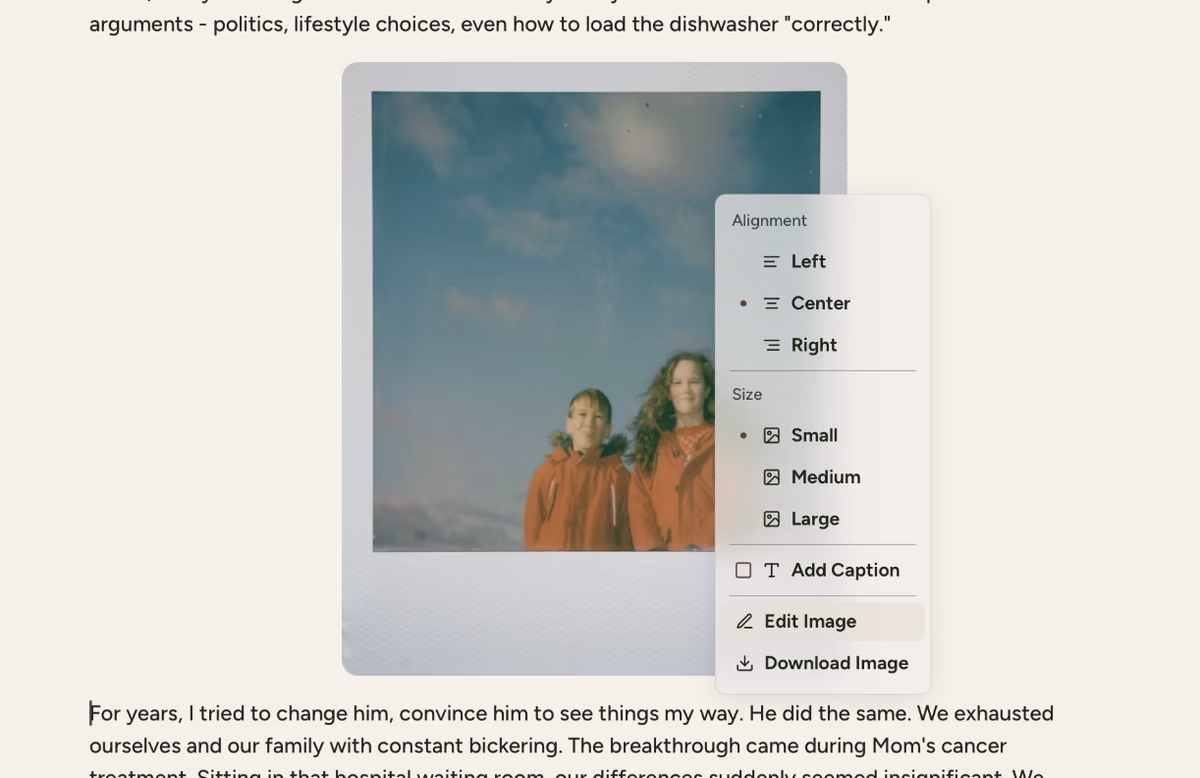
Choose 'Edit Image'
Select "Edit Image" from the context menu
Click the Crop tool
Click the "Crop" tool at the bottom of the editor interface
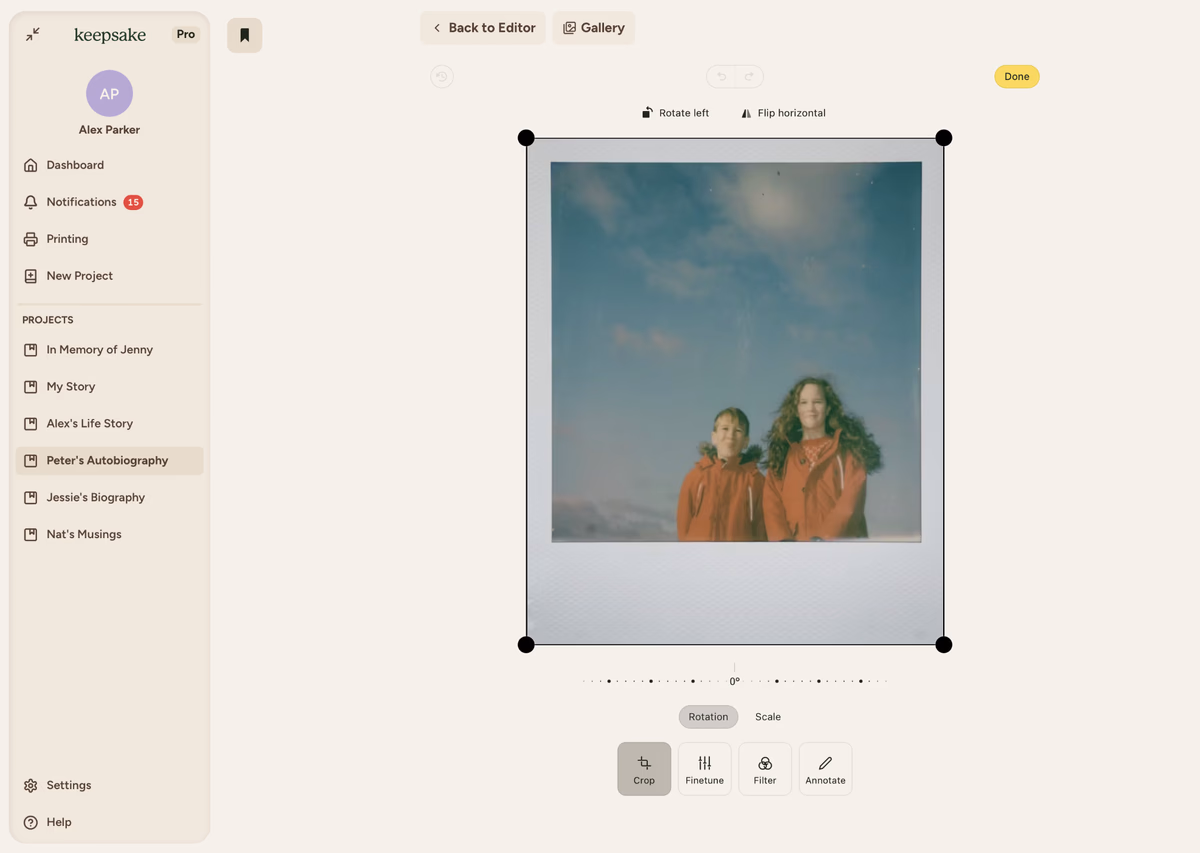
Drag the corner handles
Drag the corner handles to frame your desired area
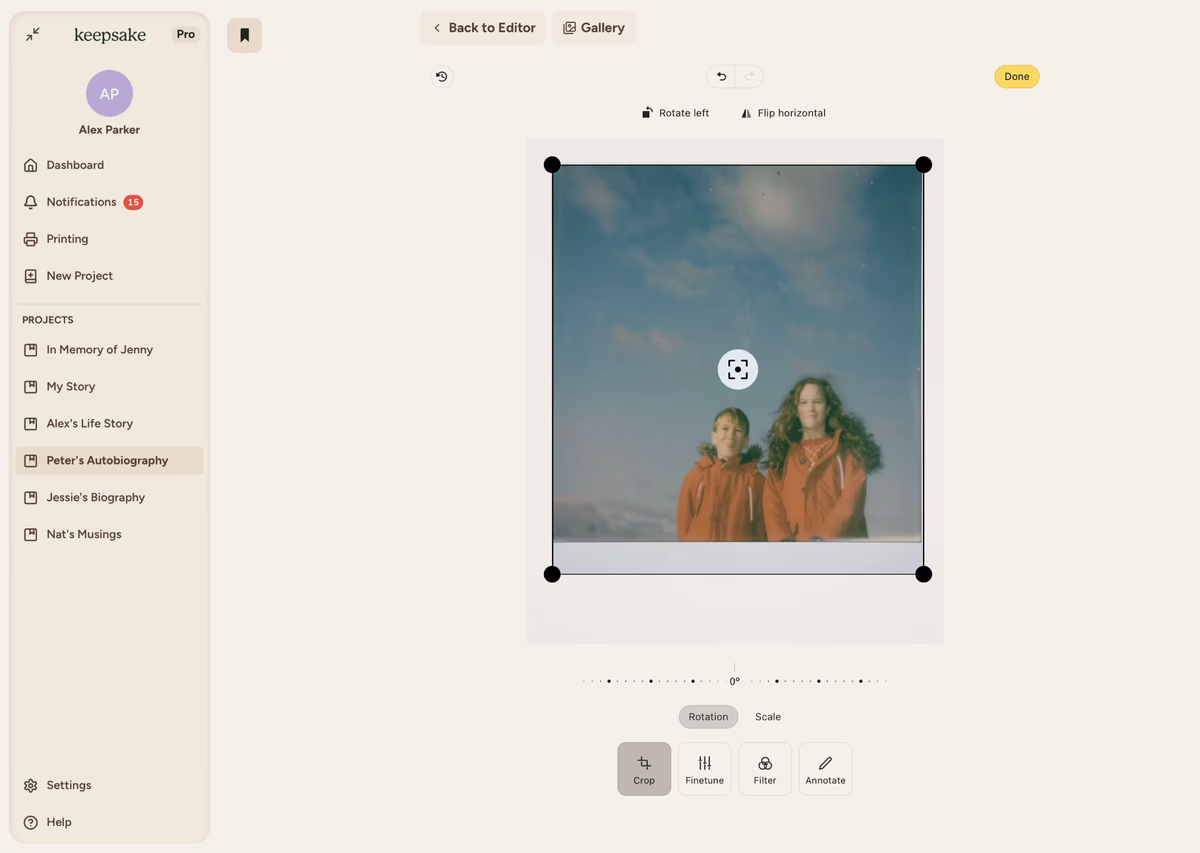
Use rotation tools if needed
Use the rotation tools in the top toolbar:
Rotate Left 90° counter-clockwise
Flip Horizontal Mirror the image
Click 'Done'
Click Done when satisfied with your crop
Return to your story
Click Back to Editor to return to your story
Cropping Tools & Features
Essential Controls
- Corner Handles Drag any corner to resize the crop area
- Edge Handles Drag edges to adjust one dimension only
- Move Crop Area Click and drag inside the box to reposition
- Rotation Tools Rotate left (90°) or flip horizontal in the top toolbar
Quick Tips
- Hold Shift while dragging corners to maintain aspect ratio
- Use the rotation slider for precise angle adjustments
- Reset anytime if you make a mistake, your original photo is untouched
Best Results Tips
- Start wide, crop gradually - You can always crop more later
- Focus on the main subject while keeping some context
- Straighten tilted horizons for a cleaner look
- Avoid cropping faces at awkward points (chin, joints)
- Keep some background - it often tells part of the story
- Don't over-crop small photos - preserve quality for printing
Common Cropping Scenarios
Group Photos
- Remove empty space around groups
- Keep everyone's faces visible
- Maintain some environment for context
Landscape Shots
- Straighten tilted horizons first
- Apply rule of thirds positioning
- Remove distracting elements
Old Photos
- Remove scanner edges and damaged borders
- Straighten if scanned crooked
- Keep any handwritten notes if valuable
Portrait Photos
- Frame from chest up or closer
- Keep eyes in upper third of image
- Remove cluttered backgrounds
Troubleshooting
Yes! You can revert to the original photo anytime using the revert feature, or re-edit to adjust your crop.
Cropping removes pixels, so aggressive crops can reduce print quality. Don't over-crop small photos.
Crop first to remove unwanted areas, then enhance what remains for best results.
Photos must be cropped individually to ensure each gets proper attention.
If you need more assistance with this topic please contact support at support@keepsakeproject.co.
Was this helpful?
Need more help? Contact our support team