Creating a Book
Learn how to turn your digital project into a professionally printed book with our step-by-step guide covering project selection, content choices, and book configuration
Once your project has stories and content, you can turn it into a professionally printed book. The process is designed to be simple while giving you complete control over the final result.
Starting the Book Creation Process
Navigate to Printing
Go to the Printing section from your dashboard
Click Create Book
Click "Create Book" to begin the printing process

Review available projects
You'll see all your available projects listed. If a project isn't listed, it may be because you haven't completed enough entries
Selecting Your Project
The project selection screen organises your projects into two clear categories:
My Projects
Projects you own and created yourself
Projects Shared With Me
Projects where you're a collaborator
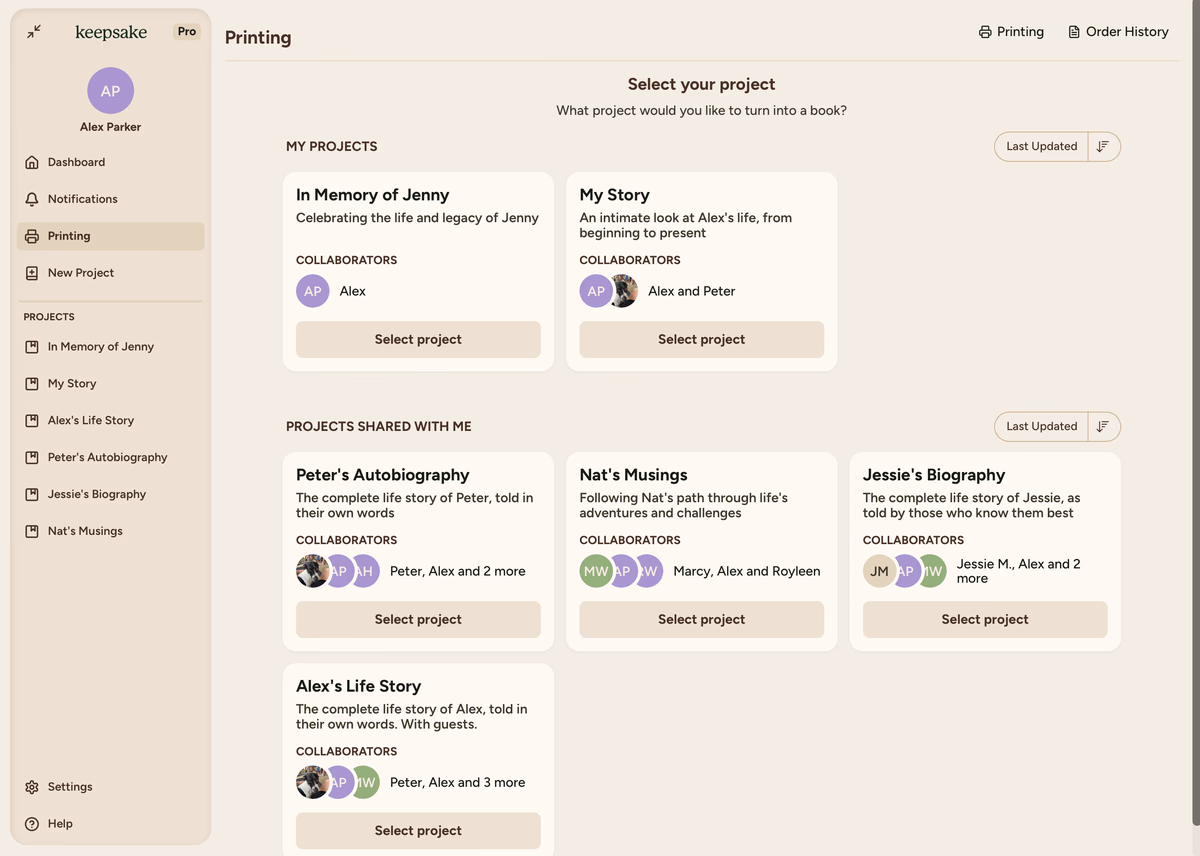
Each project displays:
- Project title and description
- List of collaborators with their profile photos
- Select Project button to proceed
Setting Up Book Details
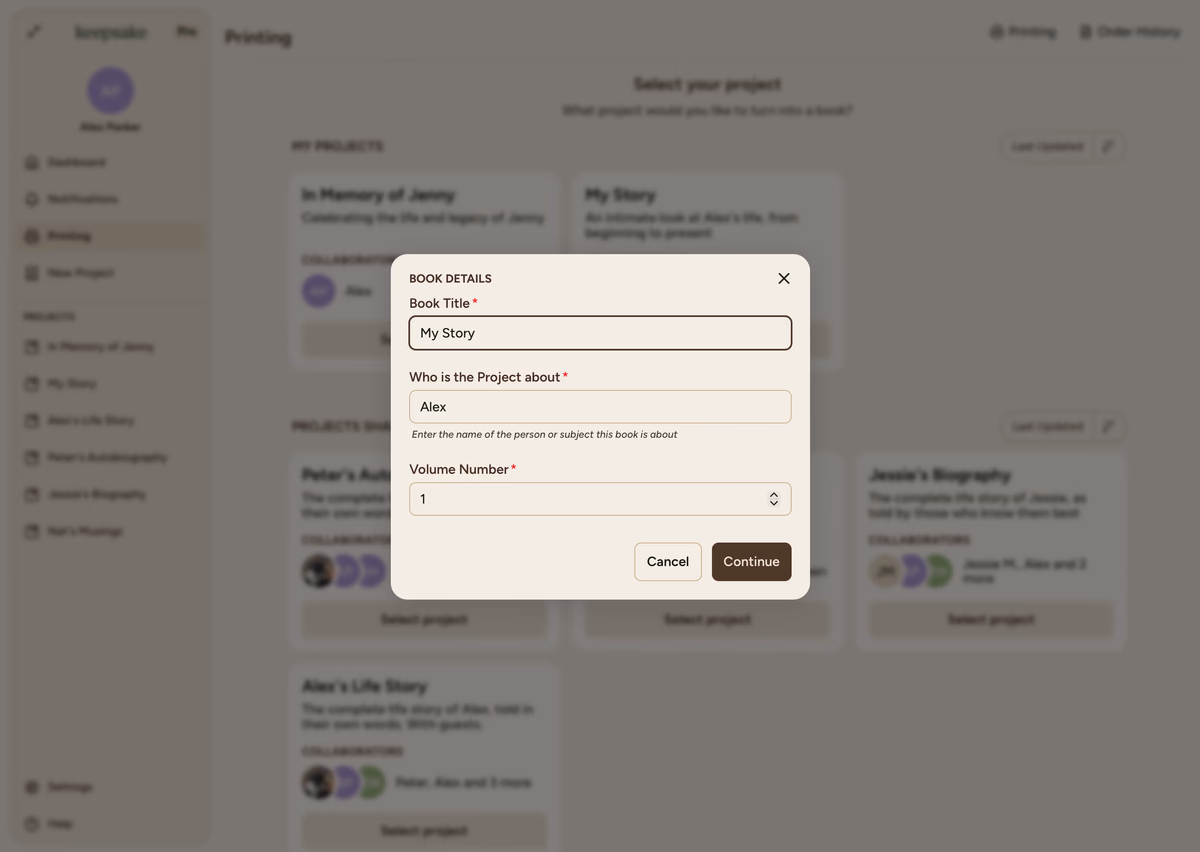
After selecting your project, you'll configure these essential details:
Book Configuration Options
What it does:
This appears on your book cover and can be different from your project name
Best practice:
Make it clear and memorable for your intended audience
Handling Projects Without Completed Entries
If your project doesn't have completed entries, you'll see this warning:
"No completed entries found. This project doesn't have any completed entries to include in the book."
To resolve this issue:
Return to your project
Navigate back to your digital project
Mark entries as complete
Mark entries as Done when you're satisfied with their content
Return to book creation
Come back to the printing section to create your book
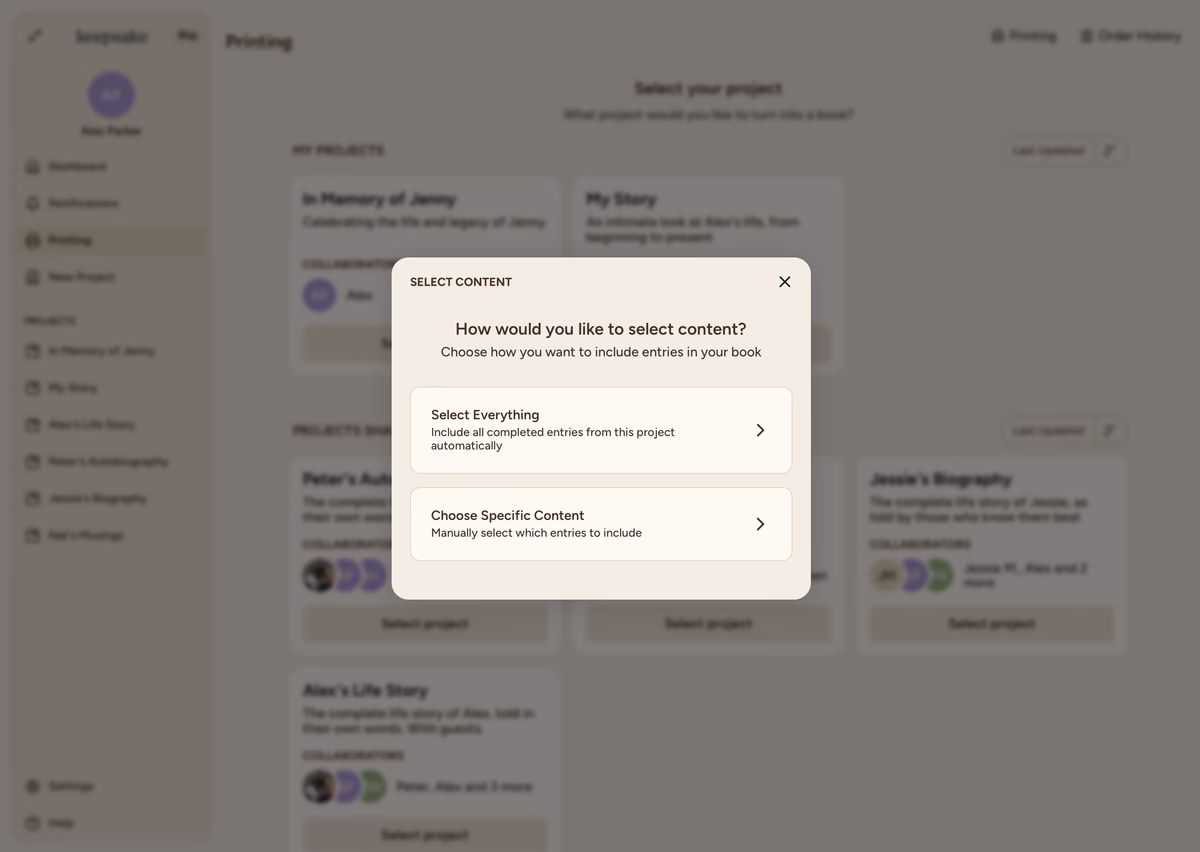
Choosing Your Content Selection Method
After setting book details, you'll choose how to select content for printing. For detailed guidance on content selection, see our complete guide to selecting content.
Automatic Selection
Automatically includes all completed entries, maintains your project's original structure, and provides the quickest option for comprehensive books.
Perfect for:
- Complete family histories
- Memorial books with all stories
- First-time book printing
The Complete Process Overview
Once you've created your book, you'll move through these stages:
Configure
Set up book details and content selection (where you start)
Print Preview
Review layout, design, and make final adjustments
Confirmation
Finalise your order and submit for printing
Tips for Success
Before You Start
Ensure your project has completed entries and choose a descriptive book title that reflects the content
Content Strategy
Consider your audience when selecting content and remember you can create multiple books from the same project
What Happens to Your Original Project
Creating a book doesn't change your original project. You can:
- Continue adding content to the project
- Create additional books with different content selections
- Share the project with more collaborators
- Make unlimited changes to the digital version
Troubleshooting
Projects need completed entries to appear in the book creation list. Mark some entries as complete in your project first.
Make sure you've filled in all required fields: book title, subject name, and volume number.
If you chose manual selection, you need to actually select chapters and entries before proceeding. Use the "Select Everything" option if you want all content included.
Yes, most book details can be modified in the Configure section before you submit for printing.
No, your original project remains completely unchanged. Book creation only affects the printed version.
If you need more assistance with this topic please contact support at support@keepsakeproject.co.
Was this helpful?
Need more help? Contact our support team