Adding a Cover Image
Learn how to add a personal cover photo to your printed book, including file requirements, editing options, and how cover images work with themes
A lovely cover photo gives your story a personal touch that colour themes alone can't quite capture.
How to Add a Cover Image
Go to Printing
Head to the "Printing" menu in your sidebar navigation
Select your book
Choose your book (if you have multiple projects)
Find the Cover Image section
Find the Cover Image section under the Cover and Chapter Templates section - you'll see a dashed outline area
Add your image
Click "Add a cover image for your book" or simply drag and drop your photo directly onto the area
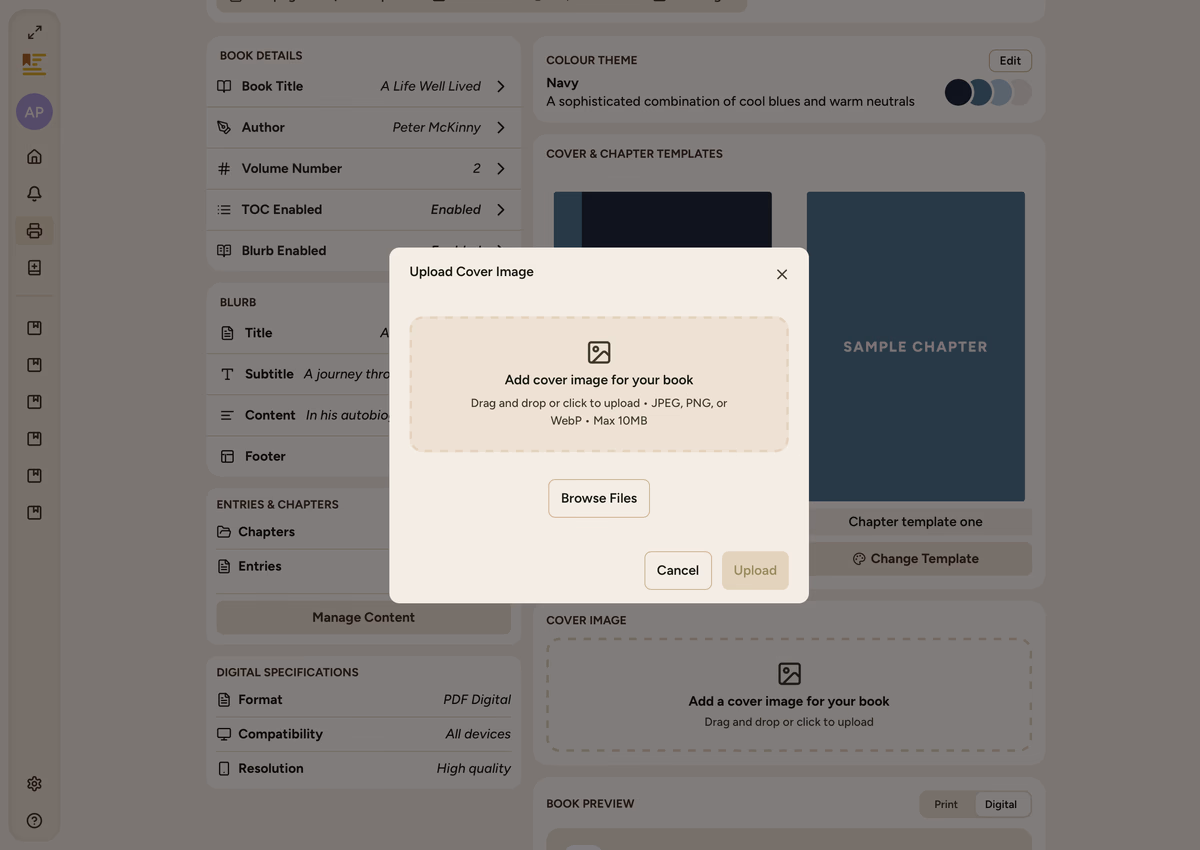
Choose your file
Choose your file using the "Browse Files" button, or drag it straight in
Complete upload
Click "Upload" and you're done!
What Files Can I Use?
Keepsake accepts these image formats:
- JPEG (.jpg or .jpeg)
- PNG (.png)
- WebP (.webp)
File size limit: Up to 10MB per image
Quality tip: Higher resolution images (like 1590 x 2400px or larger) will look crisp and professional when printed. For more detailed requirements, see our print guidelines.
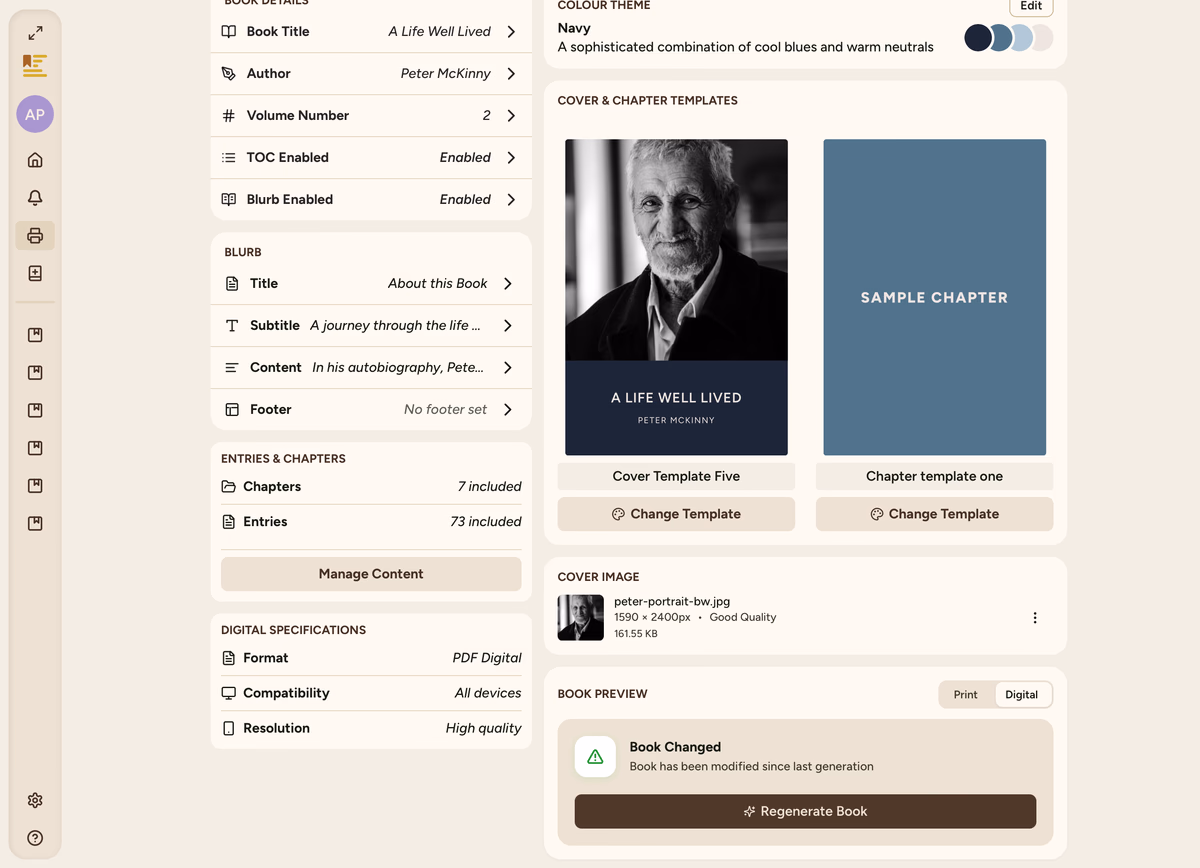
Managing Your Cover Image
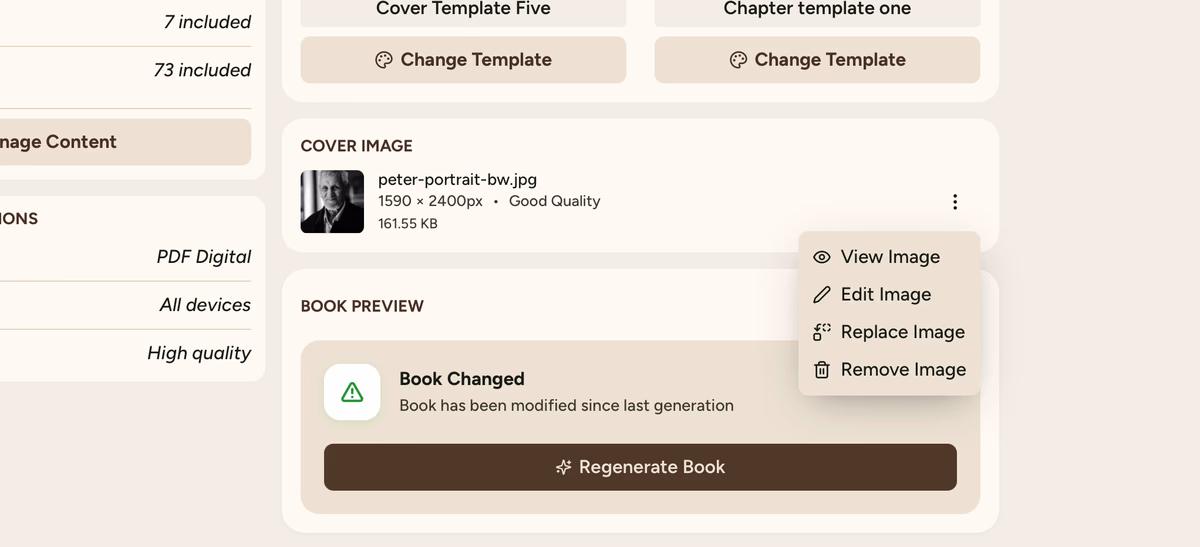
Once you've uploaded an image, you'll see it displayed with these handy options in the three-dot dropdown:
View Image
Click this to see your cover image at a larger size, perfect for checking how it looks before printing.
Edit Image
Basic editing tools to crop, adjust, or fine-tune your image without leaving Keepsake.
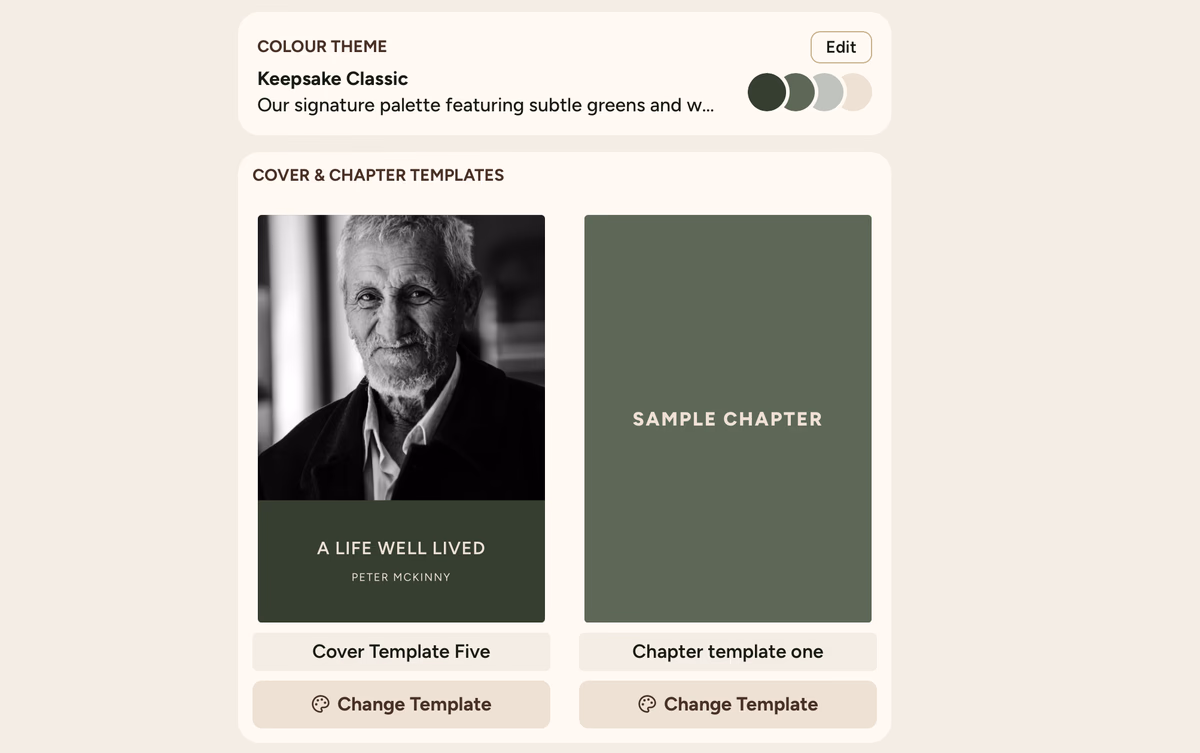
How Cover Images Work with Themes
Here's where it gets interesting: not all cover themes use cover images. Some themes are designed to showcase your photo prominently, while others focus on typography and colour.
When you select a theme that supports cover images, your photo will be integrated into the design beautifully. If you choose a theme that doesn't use cover photos, don't worry - your image is still saved and ready to go if you switch to a photo-friendly theme later.
Choosing the Right Cover Image
Portrait Orientation
Portrait orientation works best - think tall rather than wide. Your book cover is vertical, so images that are taller than they are wide will fit naturally.
Consider the Mood
A warm family gathering might suit the Sienna theme, while a formal portrait could be perfect with Navy or Neutral themes.
High Resolution
At least 1500px on the longest side for crisp printing. Good contrast ensures important details aren't too dark or washed out.
Meaningful Connection
Choose something that represents the story inside with a clear focal point. Avoid busy backgrounds that compete with title text.
Old family photos work brilliantly - even if they're not perfect quality, they often have character and meaning that makes them ideal cover choices.
Tips for Success
After uploading a cover image, you might see a "Book Changed" notification with a green triangle icon. This just means your book preview needs to be regenerated with your new cover. You can still see a preview within the Cover and Chapter Templates section.
Absolutely! If you have multiple books in progress, you can use the same cover image across different projects. Each book keeps its own copy, so editing one won't affect the others.
Click the three dots menu next to your uploaded image and select "Remove Image." This won't delete the image from your computer - it just removes it from this particular book cover. Your colour theme will still work perfectly without a cover image.
The system automatically optimises your images for both digital viewing and print quality. That's why you might see file sizes change slightly after upload - we're making sure your book looks its absolute best. If you're scanning old family photos, aim for 300 DPI or higher.
If you need more assistance with this topic please contact support at support@keepsakeproject.co.
Was this helpful?
Need more help? Contact our support team